
AD: DT Post
Hi there!
It’s release day at Simon Says Stamp! There is so much to love about this release! I’ll be having several more blog posts this month featuring cards/projects I made using items from this release! Believe me – you definitely want to check it out because it is simply amazing.
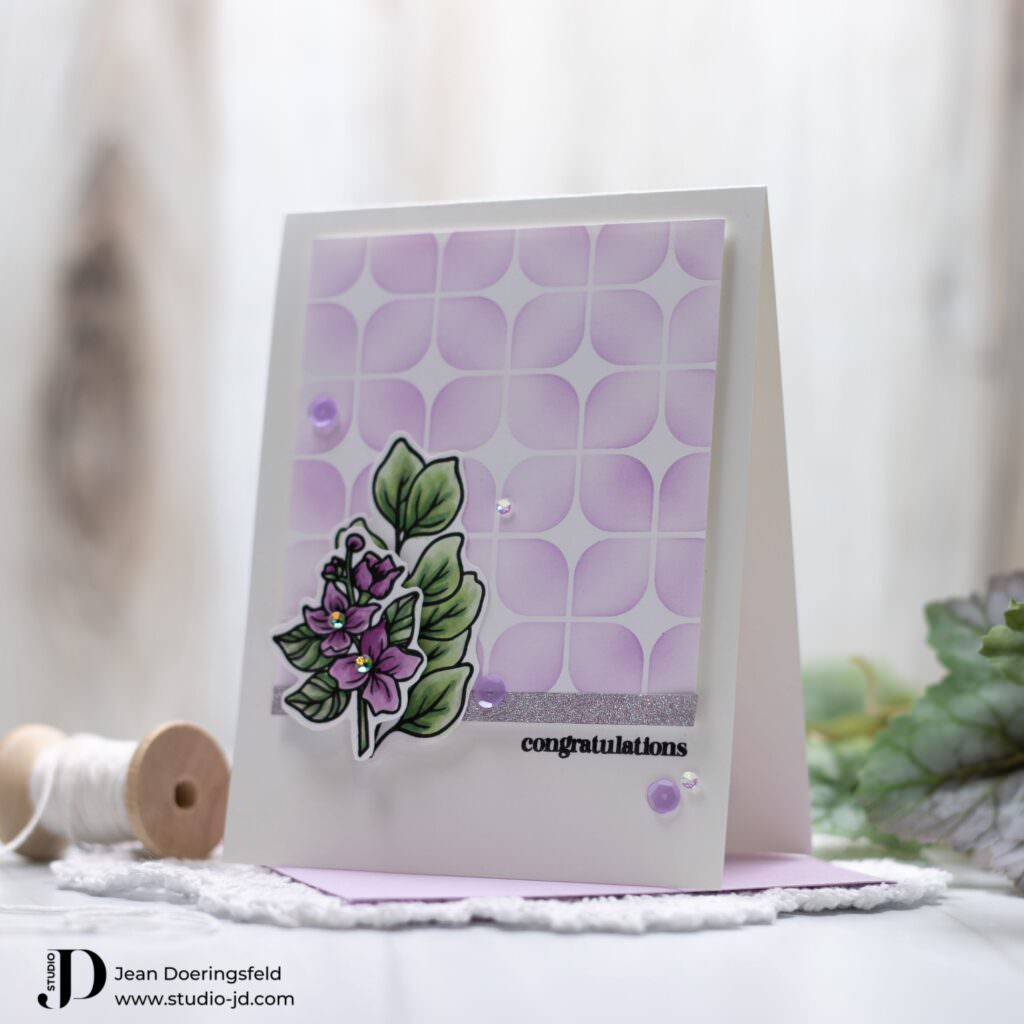
I have a few card layouts that I absolutely love. They are my go-to layouts because they ALWAYS result in really beautiful cards. Today, I’m sharing a card I created using one of those layouts because I think it does a great job of featuring the smaller stamps that you get in a large set. I don’t know about you, but sometimes I can overlook those small stamps!
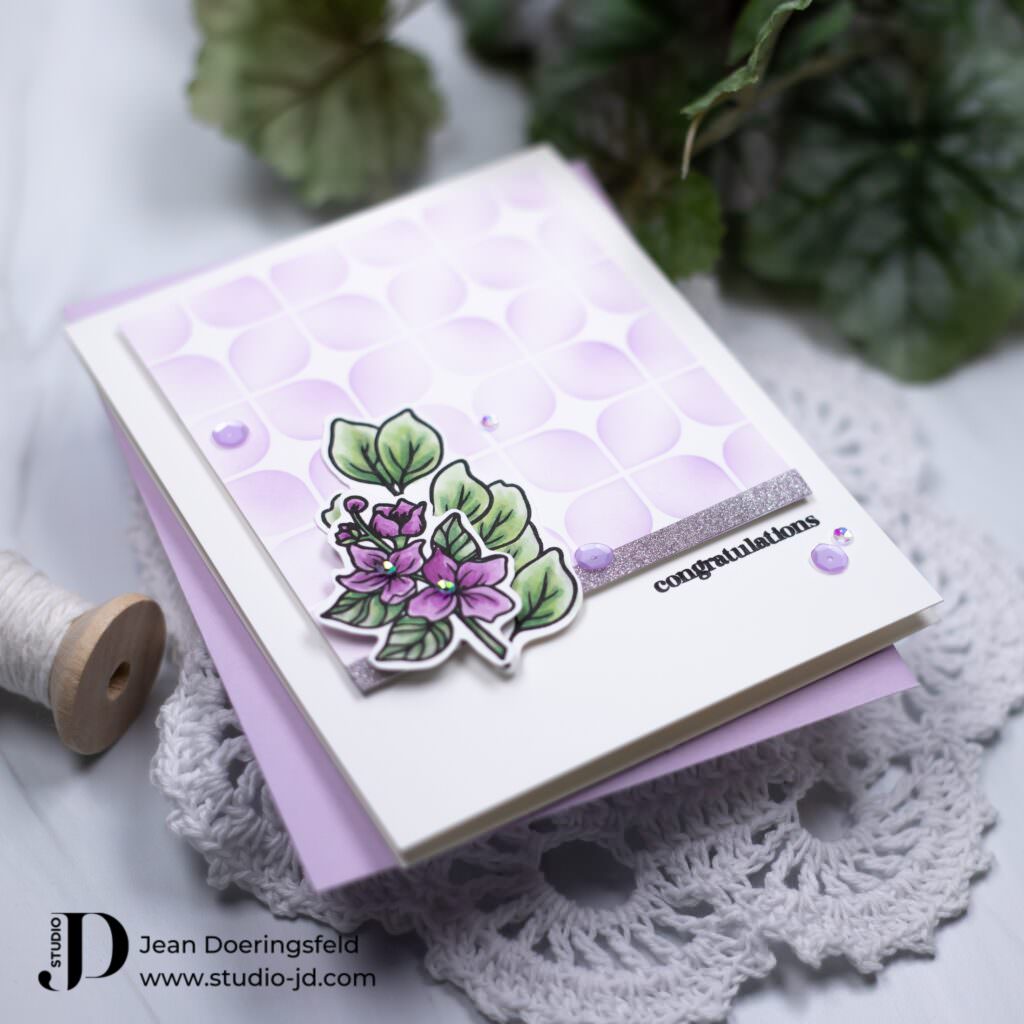
When I saw this small bloom in the Blissfull Bouquet set, I immediately knew that this layout would be a perfect way to show it off!
To make this card:
- Stamp your images in Copic-friendly ink and color them with your Copic Markers. The Copic marker colors I used are listed below in the Supply list. I used the small bloom stamp and one of the leaf stamps for this card.
- Fussy cut or die cut the images.
- Ink-blend a background that coordinates with the Copic Marker colors you used for your blooms. An easy way to find a color that works for you is to use your ink swatches. In my case, I chose the Simon Says Stamp Pawsitively Saturated ink in Lilac because I thought it was a great complement to the purple colors of my bloom.
- Trim down your ink-blended background panel so there is a bit of a border on the sides and top, and then trim down the bottom so that the panel only covers about 2/3rds of the card front.
- Stamp your greeting. You can use your background panel to ensure you get the right placement.
- Add a strip of glitter washi tape to the bottom edge of your background panel, then adhere the panel to your card front using foam adhesive.
- Adhere your leaf directly to the background panel using liquid glue.
- Adhere your bloom on top of the leaf using foam adhesive.
- Add a few gems for some sparkle!
I hope you enjoyed this project and that it inspires you to look a little closer at your large stamp sets to see if there are smaller stamps that you haven’t used!
Have a wonderfully creative day, everyone!

")


This is super-gorgeous! I love it!! This die is a little hard to get all the way punched-out and is a little delicate but it’s so pretty…. And using it to emboss is a great idea. I used this die at Create and think your card is GORGEOUS with the colors you chose. The blended green-yellow palette is amazing! Great card!!
Lori S in PA
I’m so glad you got to go to CREATE! I wish I could have met you! ♥️