
It’s Waffle Flower Link Party time! This month’s party – and my card today – feature products from Sneak Peek Club#05!
If you’re interested in getting a monthly kit with products before they are released to anyone else, you’ll definitely want to join the Sneak Peek Club! To be a Club Member, you can sign up here: Club
Once again, Waffle Flower is generously providing a GIVEAWAY* to one of my blog readers (that would be YOU) if you comment on this blog post by May 31st. The GIVEAWAY* is Kit #05 – the same kit I used to make my card for today! Winners are picked at random and will be announced on Waffle Flower’s More Inspiration blog! *the GIVEAWAY can only be shipped to the US.
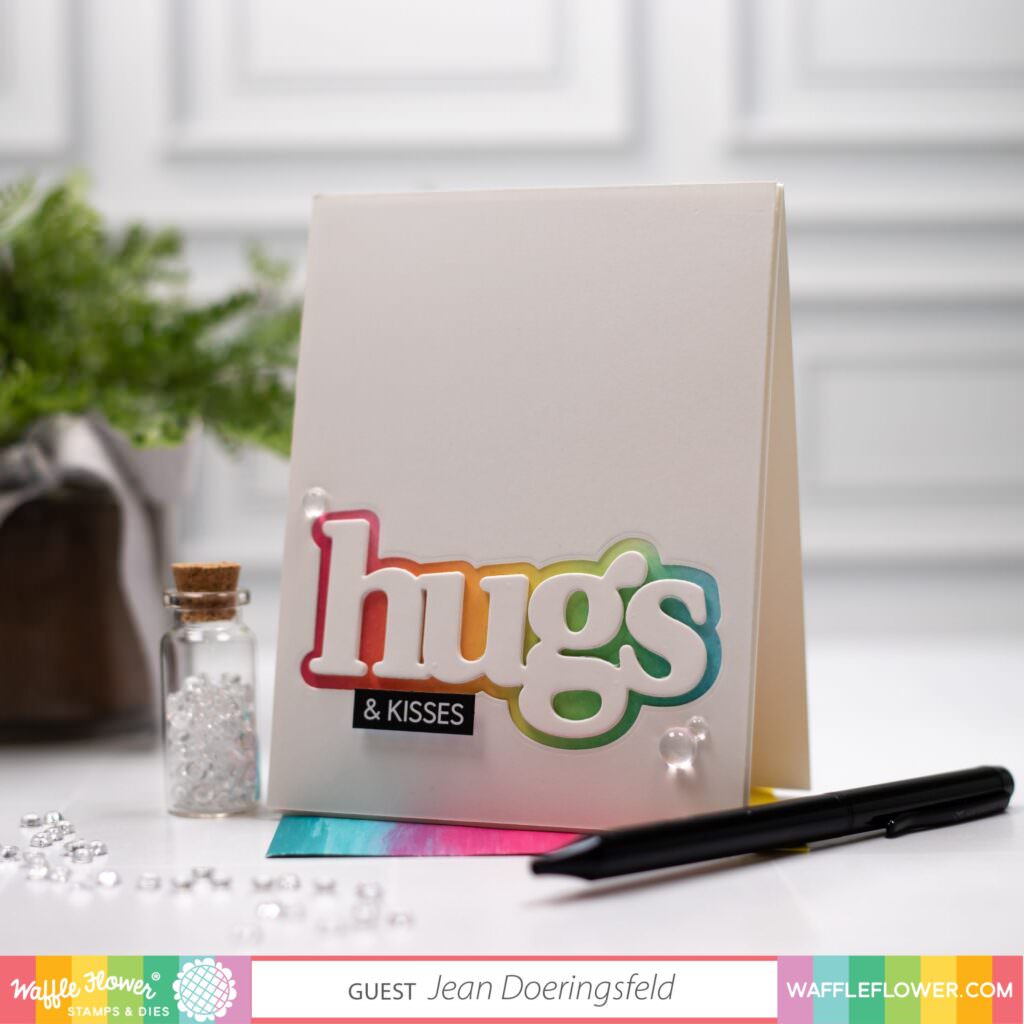
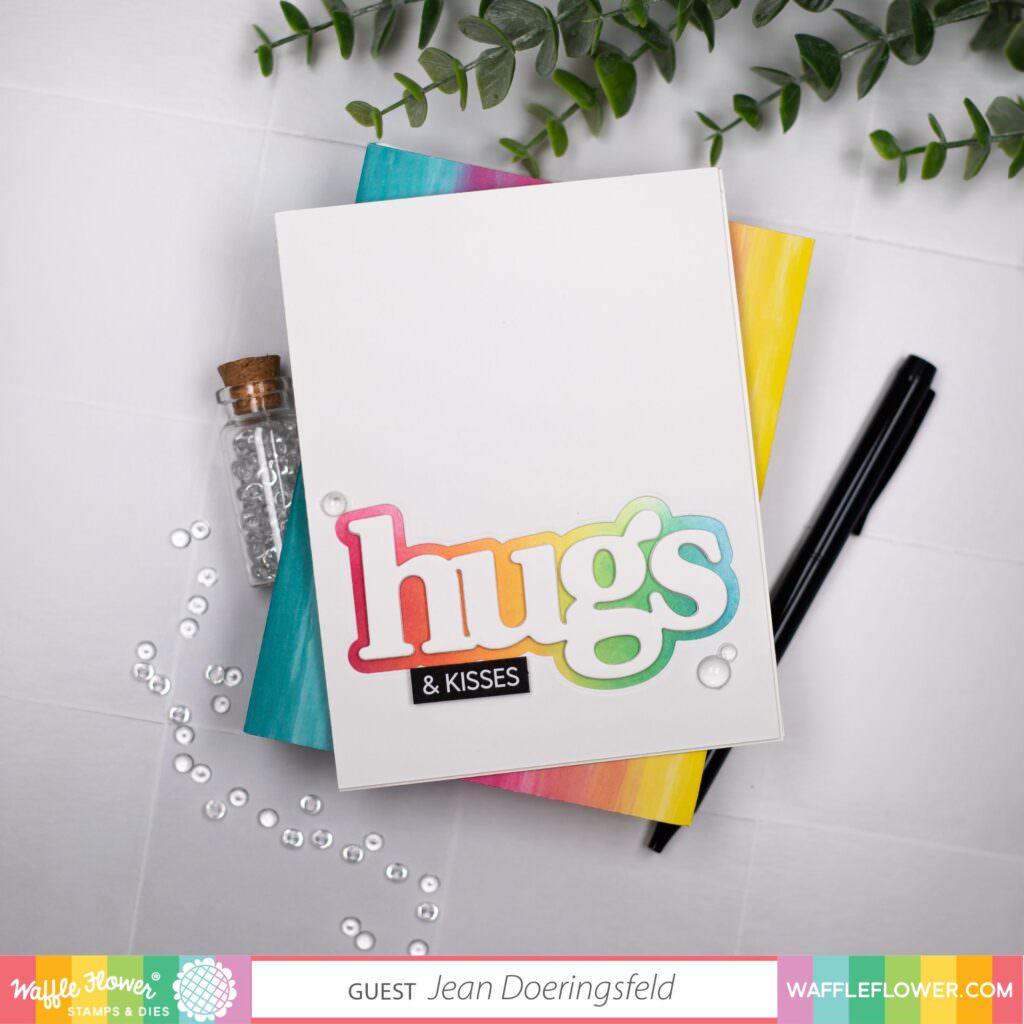
Everything on my card today uses only items from the new kit – including the Oversized Hugs Print die, the Inside Pop-Up XOs die (so cool!) and sentiments from the Mini Sentiments stamp set and the Subsentiment Hugs diecuts.

To make this card:
1.Ink-blend the bottom half of your card base using a rainbow of colors (my colors are
listed in the supplies section below) and set aside.
2.Use those same colors to ink-blend a piece of white card stock large enough for the
Inside Pop-Up XOs die, then die cut it. Set it aside.
3.Die cut the shadow die from the Oversides Hugs Print die from a white panel. I
positioned mine in the bottom 1/3 of the panel but you could put yours wherever you
like.
4.Adhere you die cut panel to your card base. You should be able to see the rainbow
colors through the die cut opening.
5.Die cut the Hugs sentiment several times out of white cardstock and adhere them
together to get some dimension. I used 3 layers of 120# cardstock and one layer of
cardstock that matches my die cut panel.
6.Adhere your Hugs sentiment inside the cut out shadow on your card front.
7.Adhere your Subsentiment (I used “& KISSES”) using foam adhesive.
8.Use a bone folder to gently fold the Inside Pop-Up XOs die on the dashed and scored
lines that were made by the die. It should fold into a “box”.
9.Making sure your X’s and O’s are facing the right way, adhere the bottom of the “box
“to the inside of your card just under the fold (leave only a sliver of room for the card
to fold).
10.Adhere the back of the “box” to the top flap of the card just above the fold.
IMPORTANT: Your card will NOT lay flat when opened. It will open to 90 degrees to
show off the dimensional pop up of the X’s and O’s strip.
11.Stamp a sentiment on the inside of the card.
12.Add a few gems to the front of the card for some sparkle!
I hope you like this card and that it inspires you to create something today! I can’t wait to see what you make with this kit (and any of the others)!
For even more inspiration, be sure to head over to the Link Party and check out what other designers have made using this kit. Pssst: you’ll have more chances to win the GIVEAWAY if you visit and comment on their blogs too!
Have a wonderfully creative day!
")


Thanks for the great tips; I’m not good at CAS, but I’m inspired to give this a try!
What a simple card that makes a huge statement! Love the xoxo popup inside the card!
This. Is. Awesome. I am still learning the basics of card making. This makes it so doable! I love everything about this…the font, sentiments and rainbow! Thanks so much for the great instructions, too! Love waffle-flower 🌈💜💜💜
Such a fantastic clean and simple card!
Great way to use the shadow die and then ink blend in rainbow colors behind the white HUGS. Your xoxo rainbow is a fun surprise! Looks like a fabulous kit!
I love how you break it down step by step for me. I am definitely a visual learner but love being able to read each step also. Just a wonderful card tutorial.
♥️♥️♥️
Love your gorgeous, colorful card! Thanks for sharing your process for making this — I found it really interesting.
I love every detail from the rainbow peeking out on the front to the pop-up rainbow xoxo’s. This card is going to make someone feel very special!!
Love this card s d the colors are beautiful!!
So cute!
I LOVE your CAS design with the rainbow background of the hugs and then the rainbow xoxo inside!
Wow! I love it.. the colors, the large sentiment, the surprise inside… amazing 👏 👏 👏
I love pop up details and this XOXO die did not disappoint! Your card is fantastic 🤩Thanks for the inspiration Jean!
Wow! A pop up is so cool.
Thank you for sharing
Love your card!! What a great new kit!
What an awesome card! Love the Hugs die!
Love the pop of colour!
I love this release. So versatile
Love the rainbow colors on both projects!
Wow! I love the inside pop-up word on your card! Looks like a fun new kit!
Awesome card! I love that Oversized Hugs die and the Pop-Up XOs die! Beautiful pop of colors and fun factor!
Love love love this card, hugs to you for sharing.
Love the rainbow background! and the oversize word is awesome!
So Pretty. I love this idea.
Gorgeous! Plus the dies are amazing. The Hugs die is the perfect font and the XOXO is genius! I always write XOXO at the end of my signature, so this is great!
Great hugs and pop up X’s and O’s
Love it
Love the pretty colors on your card! Great design! The pop-up XOs inside add such a fun surprise!
What a fun card! I love the colorful the Inside pop-up XOs! 🙂
Love the pop up inside. And who doesn’t love rainbow colors!
Loving the 3D XOXOXO!
Awesome card! I love the way the XOXO looks on the inside of the card!
I like the white on white, and the black that stands out. Nice