
AD: DT Post
Hi there!
Are you getting ready to plant your garden? Every year I say I’m going to plant some flowers for pots on my deck and that I’m going to make a couple raised beds for veggies…and every year that never happens. I am simply not a gardener. I have a true appreciation for those of you that are, though! I’ve seen some amazing gardens and I know a lot of people who find gardening very therapeutic. And me? I’m perfectly content in my role as Garden Appreciator Extraordinaire! LOL!
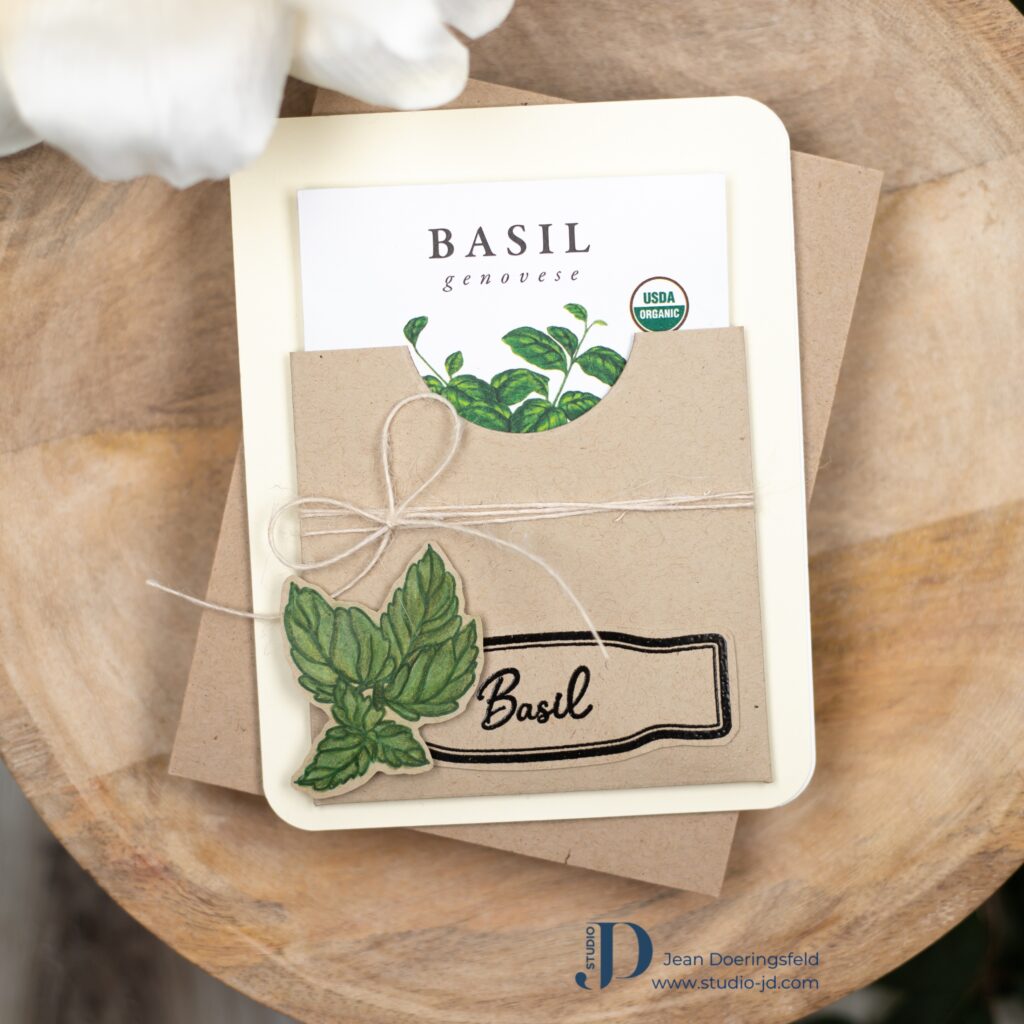
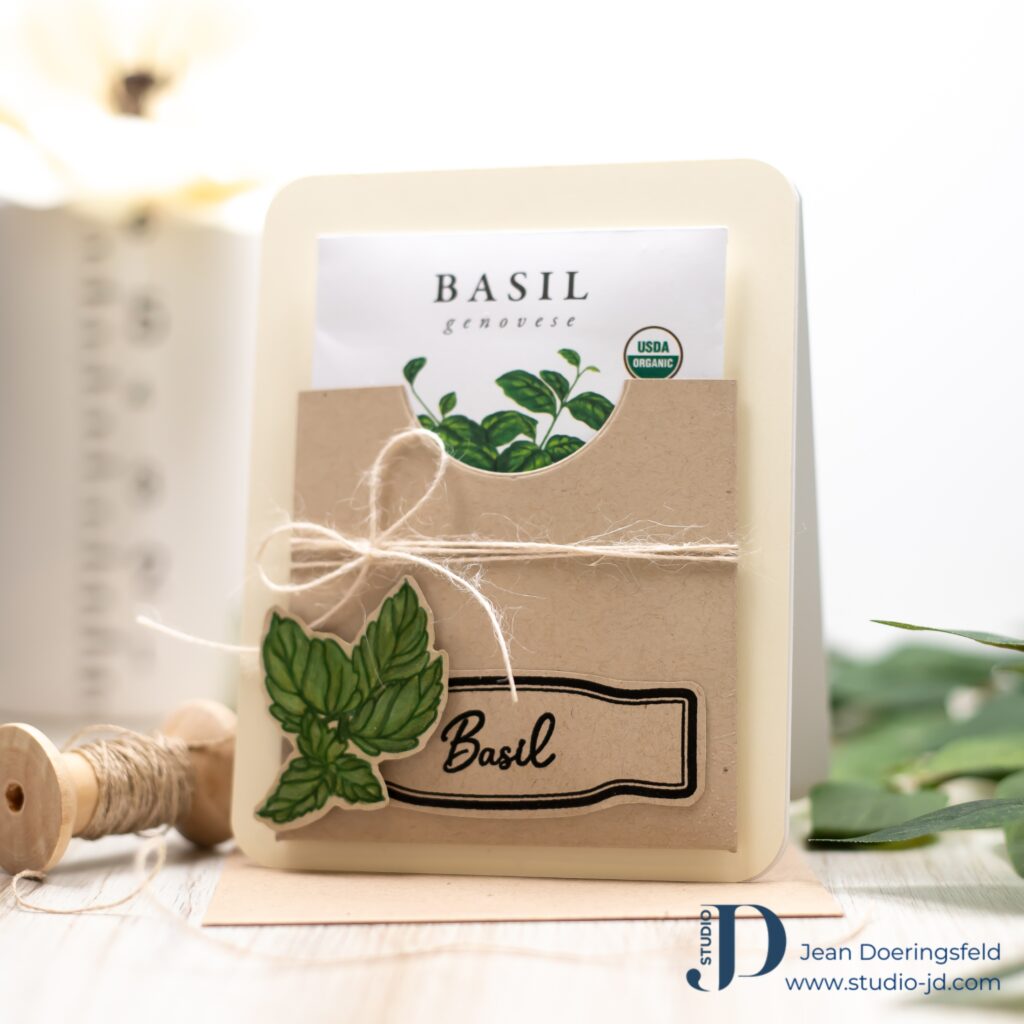
My card today is a seed pocket gift card that I like to give my gardener friends in the hopes they will gift me back with the fruits of their labor <hint hint if you happen to be one of those> For this card, I chose basil. I love basil.
To make this card:
- 1.I measured my seed packet and created a pocket that would fit around it – being careful to leave enough room for the seed packet to slide in an out but not so much that it falls out easily.
- I used a circle die to cut out the little dip in the front of the pocket. You could also use a circle punch.
- I Assembled the pocket, putting twine around it a few times and then securing it to a cream-colored panel with strong double sided adhesive tape.
- I stamped the label from the Herb Labels stamps set using permanent black ink, then heat embossed it with clear.
- Next, I stamped the word “Basil” from the set in the middle of the label using the same method as in step 4.
- I cut the label out and adhered it to the seed pocket.
- I stamped the basil leaves using Ink on 3 Fade Out ink on a piece of Desert Storm cardstock and colored it with Copic Markers to get a no-line coloring effect.
- To add a few details to the basil, I used my Prismacolor color pencils, then I fussy cut it out to add to my card.
- I added the basil to the front of the seed pocket by the label, popping it up using foam adhesive.
- I add the panel to my card base and then rounded the corners with my corner- rounder.
Are you a gardener? Or a garden appreciator like me?
Thank you for stopping by my blog today! I hope this card inspires you to create something amazing!
Have a wonderfully creative day, everyone!
")


0 Comments