
AD: DT Post
Hi there!
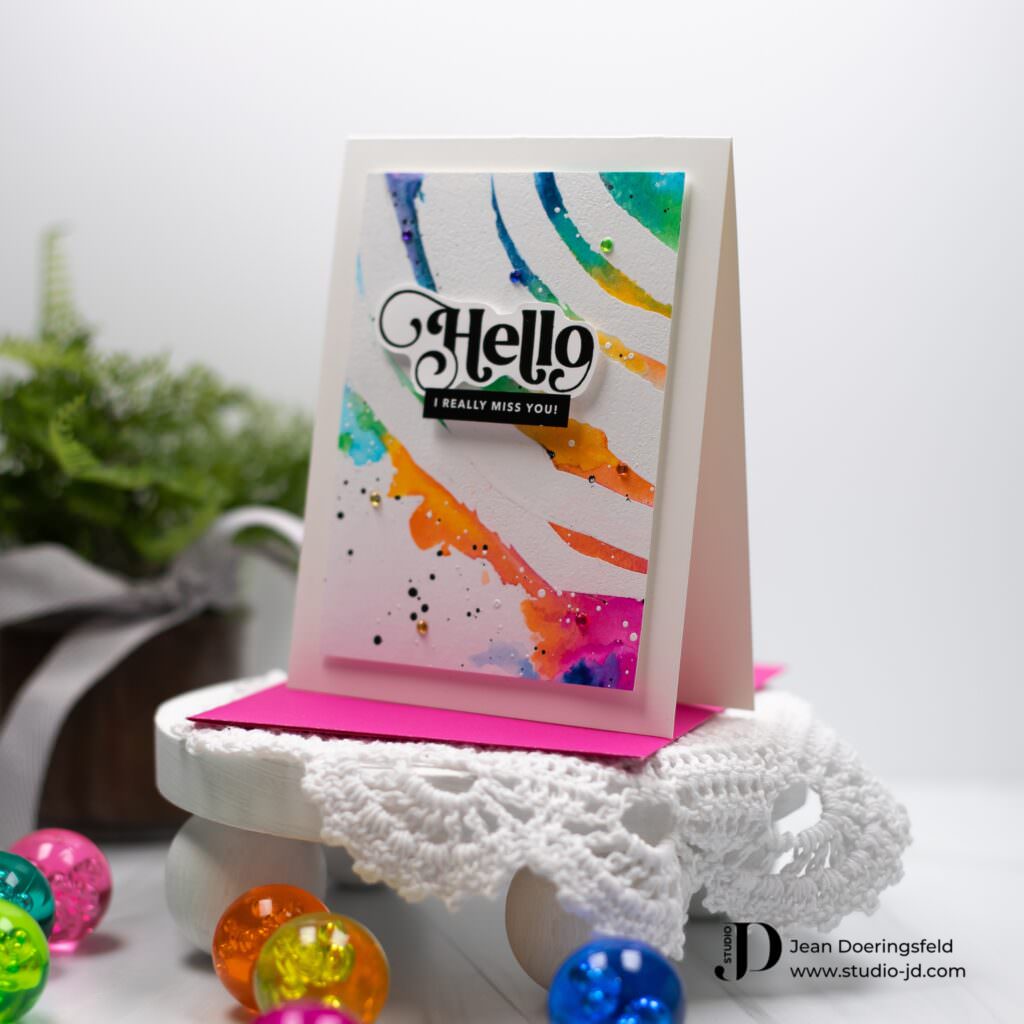
I’ll admit it: I love, love, love a great font. I think the style of a font can make or break a design and I am oh so picky about finding sentiments in fonts that are not only stylish but also readable. So, you can imagine how thrilled I was to see this new Elegant Modern Greetings stamp set that is part of Simon Says Stamp’s current “Dear Friend” release! I mean… Oh. My. Gosh! This font is out-of-this-world gorgeous!
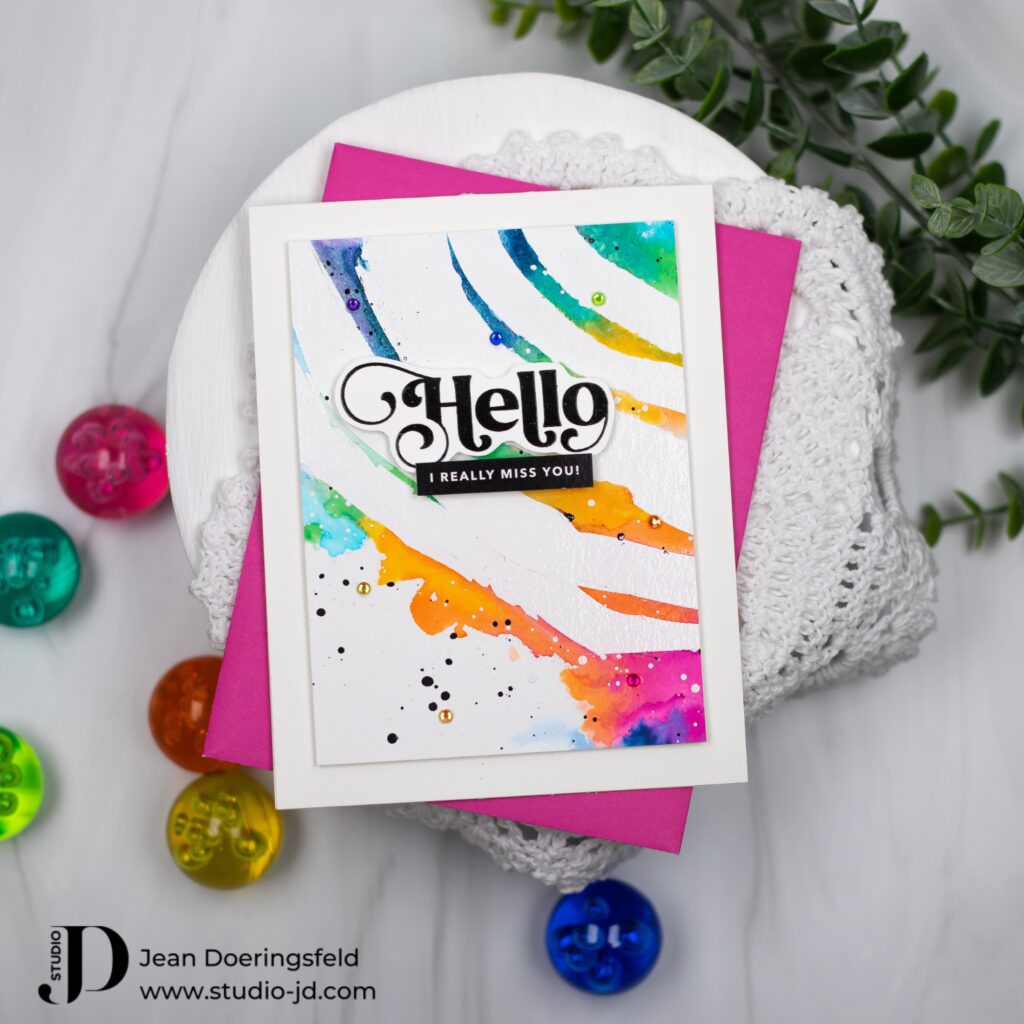
I created this card entirely around this font. I wanted a modern look that was also bold – and I knew that whatever I created needed to really let the font shine. What do you think? Did I do it?
This card is super simple to make:
- Heat emboss the Painted Rainbow background stamp in white on watercolor cardstock. The Painted Rainbow stamp lets you remove the different painted arches and place them however you like – or you can leave it all together and stamp it that way. For this card, I removed and stamped the individual painted arches so that I could place them closer together and could focus the rainbow in the upper right portion of the card.
- Use watercolor markers to watercolor over the top of the embossed rainbow arches in whatever color order you want (just remember that some colors can turn “muddy” if you mix them – so be a little careful where you place them). I used Altenew Watercolor Brush Markers from the Tropical Fiesta set so that I could get really bright, intense color. Also…this is a “sloppy” technique – so don’t try to be too careful with where you put the color or to stay inside the lines – just have fun with it!
- Set the panel aside to dry.
- Heat emboss the “Hello” sentiment using black pigment ink and clear embossing powder, then die cut it or fussy cut it.
- Cut out a sentiment strip from the set to use as a sub-sentiment.
- Once the water colored panel is dry, splatter it with white paint. Wait for it to dry again, then splatter it with black paint. If desired, you can gently wipe off any splatters that get on the white embossed arches.
- Once the panel is completely dry, trim the panel down and adhere it to your card front using foam adhesive.
- Use more foam adhesive to add your “Hello” and then double the foam adhesive to add your sub-sentiment strip.
- Add a few small gems in multiple colors that match the water color paint you used on your panel.
I hope you like this project, and it inspires you to use a sentiment in your favorite font as inspiration for a card or other paper project! Thank you so much for stopping by my blog!
Have a wonderfully creative day, everyone!
")


0 Comments